
Fast, Inc. Jack installation instructions
Tools Needed:
1) Ratchet with 'l2", 9/16", and 17mm sockets 2) W' wrench
3) 9/16" wrench
4) 17mm wrench
5) 1\4" AIlen wrench
6) 1/2" drill
7) 5/8" hole saw
8) 1/4" drill bit
9) Small file
10) 1" deep well socket or similar part
11) Red Loctite
Procedure:
1) Disconnect front limiter strap( s). and unbolt the front/center shock at the
top shock eye. Disconnect the rear bolts from the top shock and then carefully
lower the skid to the floor. You may need to use jack or block on the under side
to help support it during bolt removal.
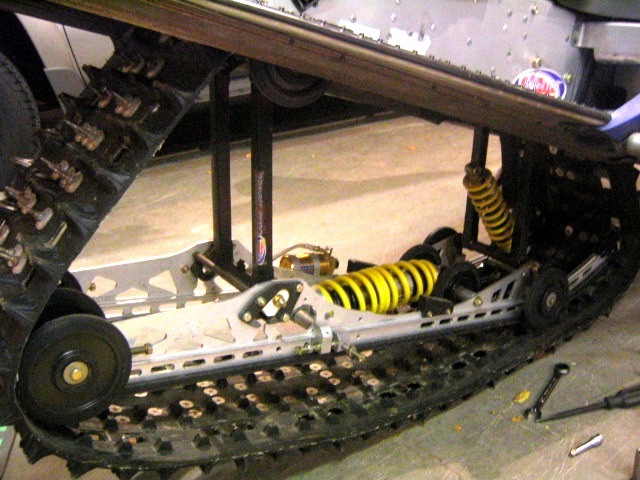
2) Remove rear shock from the suspension by unbolting lower cross shaft and tip
shock side to side.
3) Remove FRA adjuster blocks and lower cross shaft spacers and shaft from the
lower shock eye.
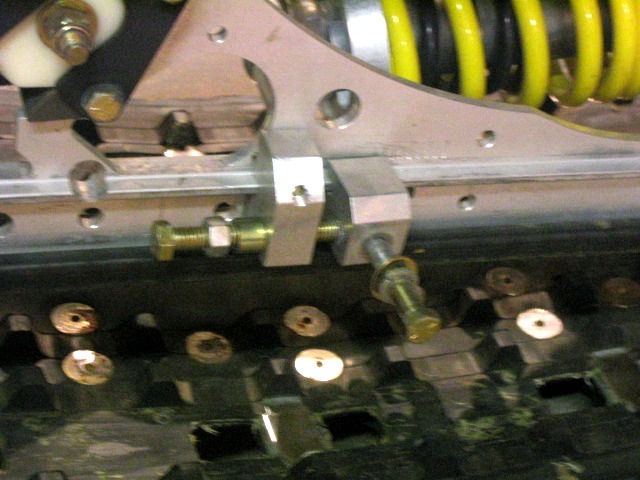
4) Using diagram, locate drill position on right hand rail. Drill through with
1/4" drill bit. Note: right hand rail determined by sitting on sled facing
forward
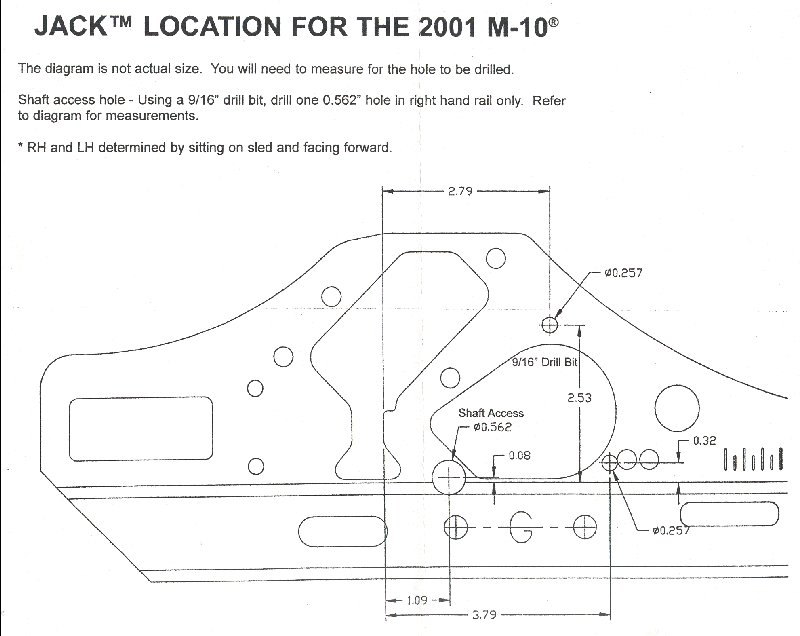
5) Verify hole location is correct and drill through at new 1/4" hole with the
5/8" hole saw. Note: you may want to clean the finish with a small file. Most
newer style M10 rails will have these holes already supplied and moving onto
step 6 will be required.
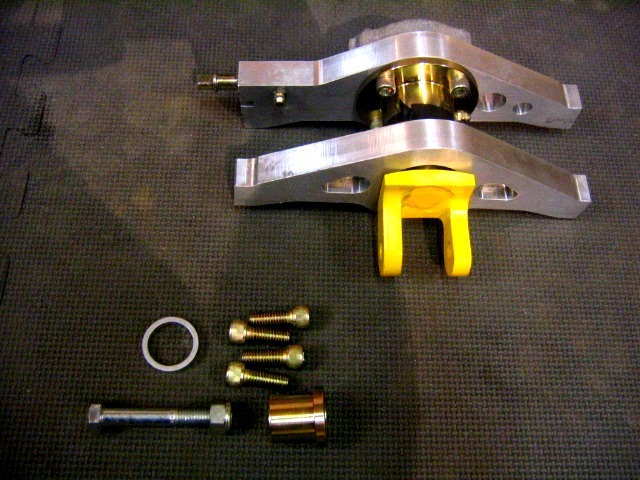
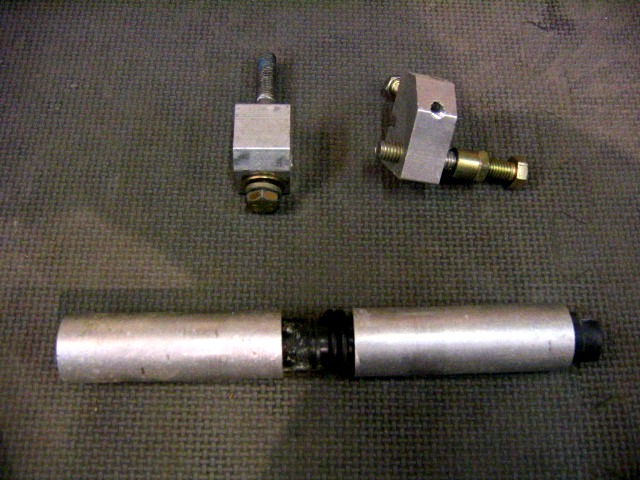
6) Using a press, or bench vice, replace the fiber glide bushing in the lower
shock eye with the metal Jack bushing. Place the 1" deep well socket on one side
of the shock eye, the outer Jack bushing on the other side, and press the Jack
bushing in. The fiber glide bushing will be left in the socket.
7) Press the ring on to the Jack bushing.
8) Unbolt rear axle, the bolt through the slide blocks, the smaller cross shaft
in the slide block area, and the bolt through the mid idler wheels so the rails
can be spread apart.
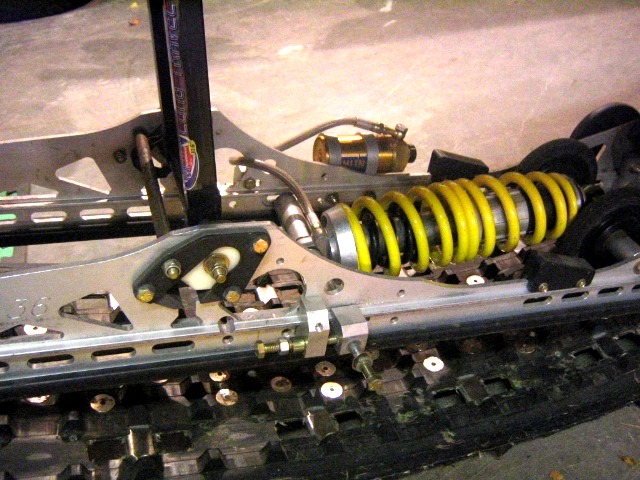
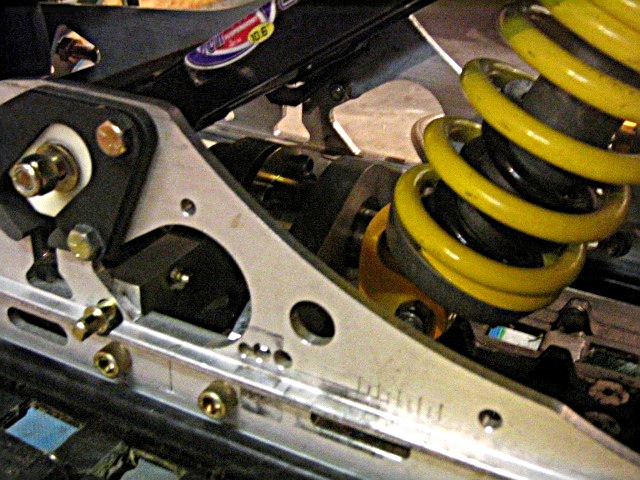
9) Insert the Jack unit into the suspension and secure with alIen bolts. Use red
loctite on the allen bolts.
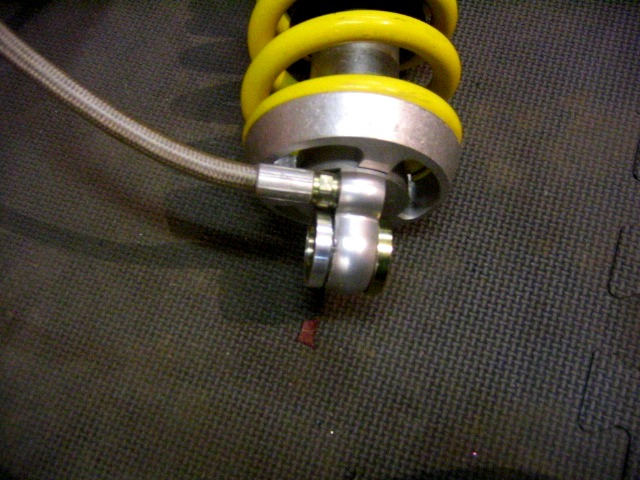
10) Install the rear shock into the suspension placing small Jack bushing in
lower shock eye and securing into clevis with the 17mm bolt and nut. Install the
rest of the shock as previously installed.
11) Reattach front top shock bolt and reset your imiter strap.
12) Finally user your original set up card to find your desired jack setting.
Use and service of the Jack:
The Jack has been greased by Fast during assembly. but it should be
greased every 1000 miles. or at least seasonally.
a) To grease the Jack. set to full
extension and pump in 2 pumps of high quality, low temp
grease to main housing, and two to the input shaft
b) In some instances the Jack may
become overfilled with grease, and will not be able to travel to the lightest
settings.
To remedy this, follow this procedure:
I) Remove the grease zerk on the main housing of the Jack:
II) Crank to lowest setting:
III) If you are still having trouble expelling the excess grease. remove the
shock from the Jack clevis and allow it to rotate while cranking the Jack to its
lowest setting.
IV) Replace grease zerk and return Jack to your normal ride position.
Totallyamaha is not responsible for any damages that these modifications may cause to your vehicle; any modifications are your responsibility if you choose to do so. We are providing information ONLY. Some of these modifications may VOID your warranty and that is your responsibility to look into. The Totallyamaha users have passed along most of the information found on this site. If you have any questions or concerns about anything on this site talk to your dealer before using any of the information. Totallyamaha will not be liable for any damages or personal injury from any modification performed from this site.
![]()