Maxximum Performance
RX-l SILENCER INSTALLATION
"This is one exhaust you will not be disappointed installing on your RX1."
After Logging well over 800 miles on it , the sound is still as sweet as the
day it was unveiled. The exhaust system is made from stainless steel , 5lbs
lighter then stock and has trial friendly, throatier sound then stock. The
5 hp gain through the entire power band is not real noticeable by the seat of
the pants but if you would take 2 identical sleds and run them side by side one
with the Maxximum exhaust and the other with stock, the Maxximum exhaust sled
will just nudge ahead of the pack. The only down fall of this product is the
deeper sound at wide open throttle that will take time to get use to. Also the
workmanship on the gasket ends and the tweaking we had to do to get the exhaust
tips lined up is less then desirable but all in all a great product.
|
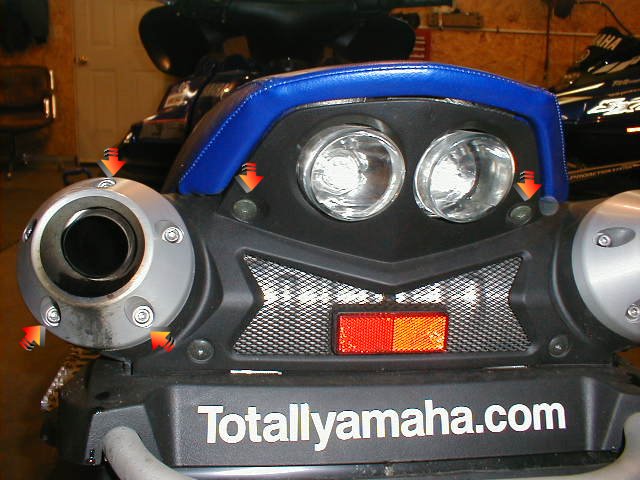
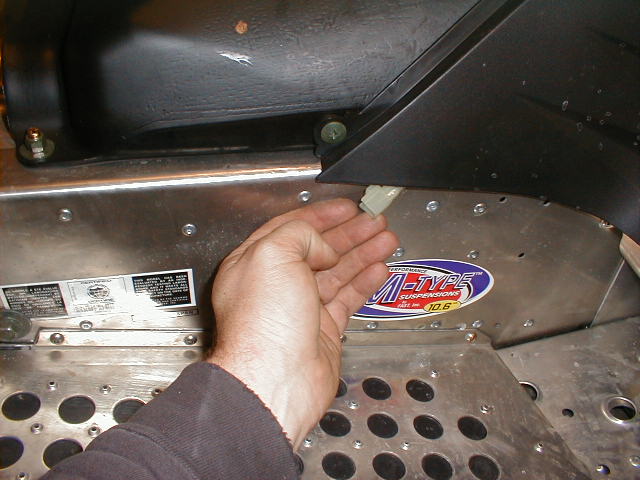
1. SEAT REMOVAL: Start by removing the top and two lower exhaust end cap bolts with allen wrench. Remove exhaust end caps, taillight screws and cover and right side tank cover as noted by arrows at Pic 1. From the left side of the sleds fuel tank, reach between the side panel/tank cover and tunnel edge and disconnect the taillight wires. (Pic 2) Remove the nuts from the seat hold down j-bolts. (Pic 3) Lift up gently and pull seat to the rear of the sled to un hook it from under the fuel tank.
Pic1
|
Pic 2
Pic 3 |
|
Pic 4
Pic 5
|
Note: According to Maxximum Performance you will have to remove the fuel tank
but if you want an easier rout to take scroll down to alternate or follow
step 2.
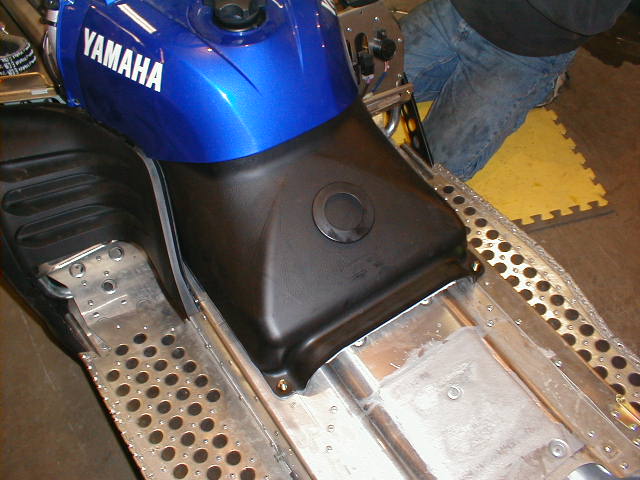
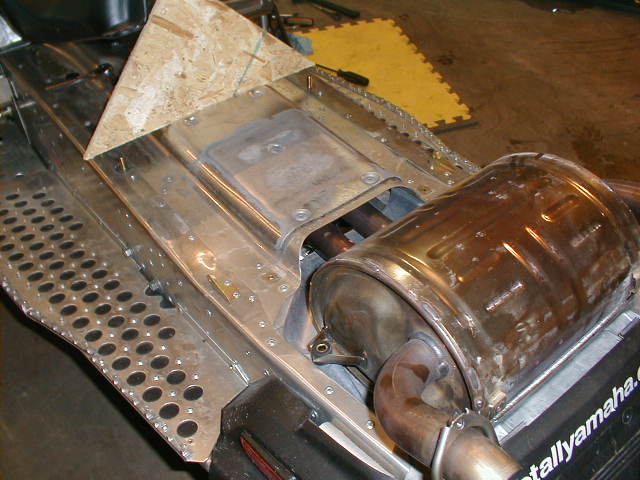
2. REMOVAL OF FUEL TANK: Next you need to remove the fuel tank. Drain the fuel from the tank, remove the left side cover, disconnect the fuel level sender and both hoses from the fuel tank. Remove upper tank screws and mounting nuts. Lift rear of the tank and slide it out to access the tank vent. Remove the fuel tank. Alternate 2: Remove both side cover screws at the base of the tank, 4 main tank cover screws (Blue Portion) and the 2 nuts that hold down the tank. Remove gas cap and tilt the tank enough to pull the fill area through the cover to pop off the fill rubber donut. At this time you can prop the tank up with a piece of wood as show in pics 4 & 5
|
|
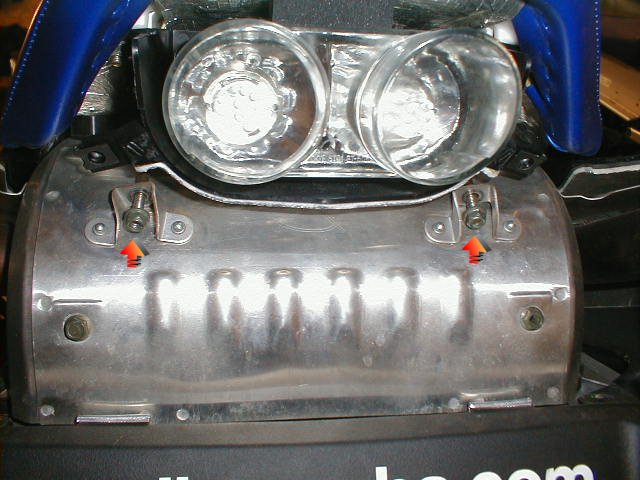
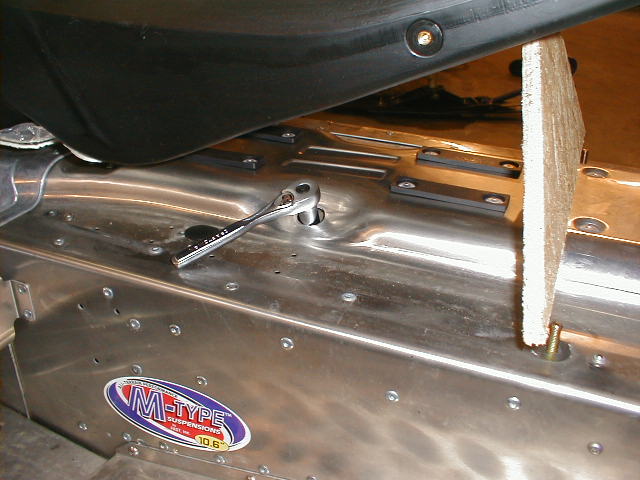
Pic 6 3. Remove the exhaust pipe black side covers from the tunnel and heat shield from the stock silencer . Next remove the 4 muffler bolts that hold it to the rear of the tunnel. With the tank removed or propped remove the 2 rubber pugs from the tunnel. These will gain you access to the exhaust clamps (Pic 6). Loosen exhaust clamps with 12 mm ratchet (Pic 5) . Remove muffler by pulling towards the rear of the sled. NOTE: Due to limited area, it is a very tight fit between the exhaust pipe, top of the tunnel and the rear section of the chassis. Some force may be required to remove the muffler assembly.
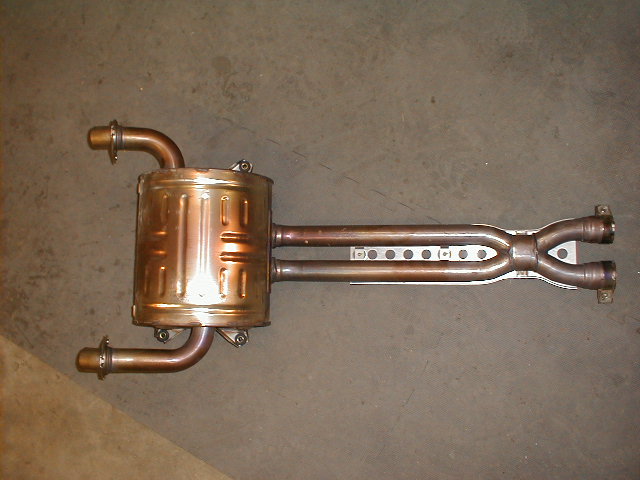
Stock Exhaust |
Pic7
Pic7 |
|
Pic 8
Pic 9
|
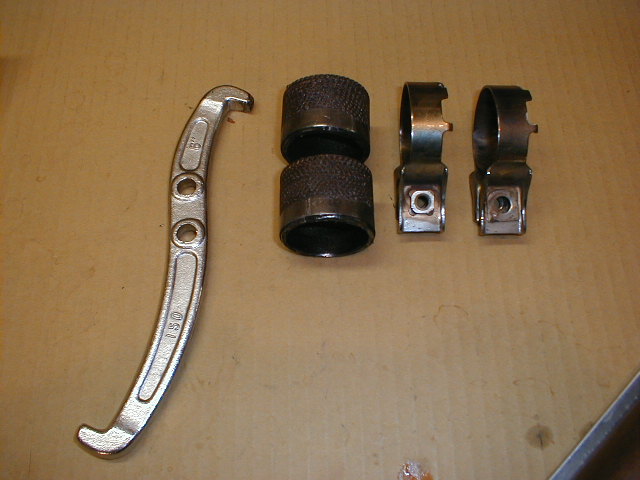
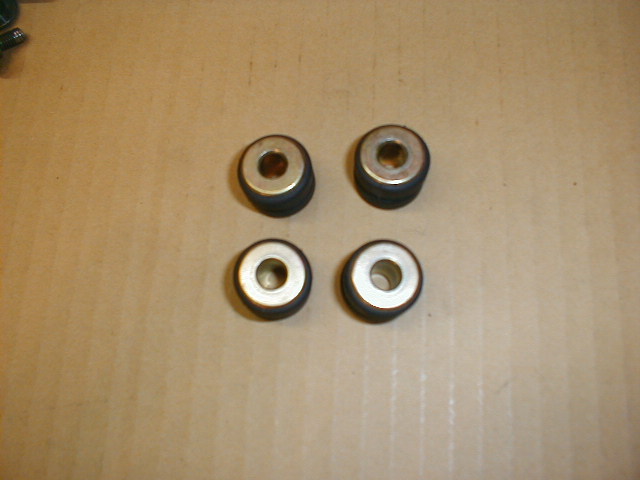
Now that the stock exhaust is out you will want to either have new exhaust gaskets purchased for this install or reuse the stock gaskets. To remove the stock gaskets use a hook device as shown in Pic 8 and slowly pull the gaskets from behind through the pipe. It is a extremely snug fit so please take your time. Note: Parts to save and set on the side are exhaust gaskets, exhasut clamps and the rear rubber bushings, spacers, washers and nuts. Pic 8&9. |
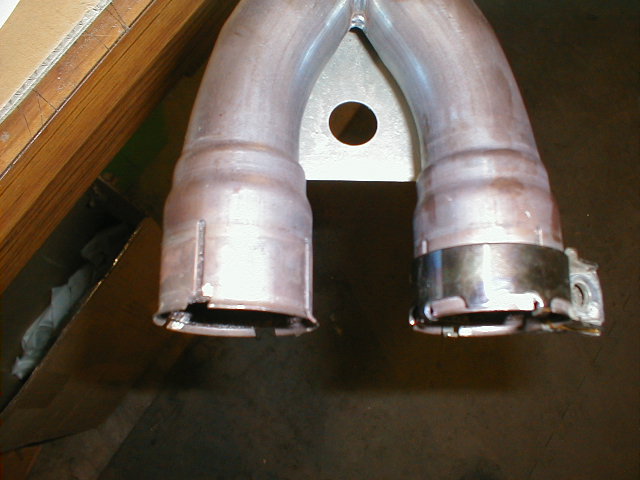
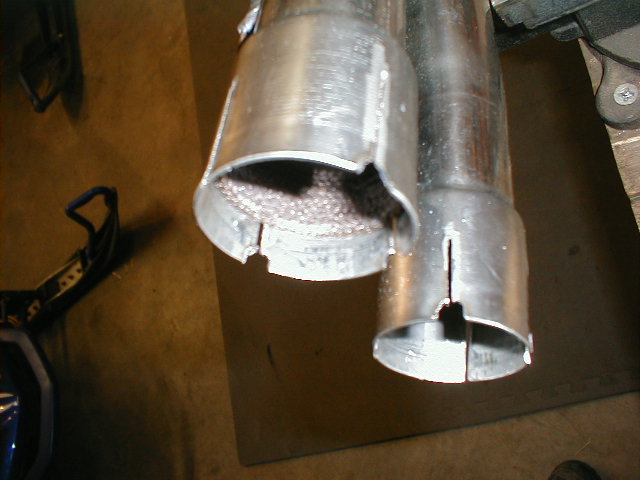
| Before installing
the stock exhaust gaskets onto the new stainless steel exhaust, take special
notice to the notches in the stock exhaust and how the clamps fit onto that
exhaust. (Pic 10) The new exhaust will need some modifications to the
notches with a die grinder or side grinder to get the clamps to fill on
properly. (Pic 11)
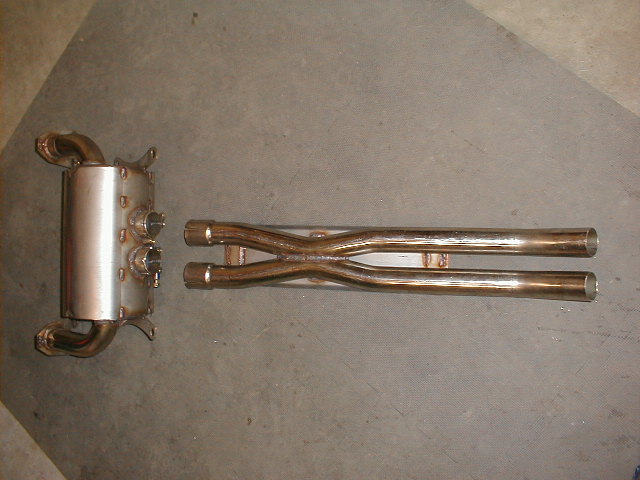
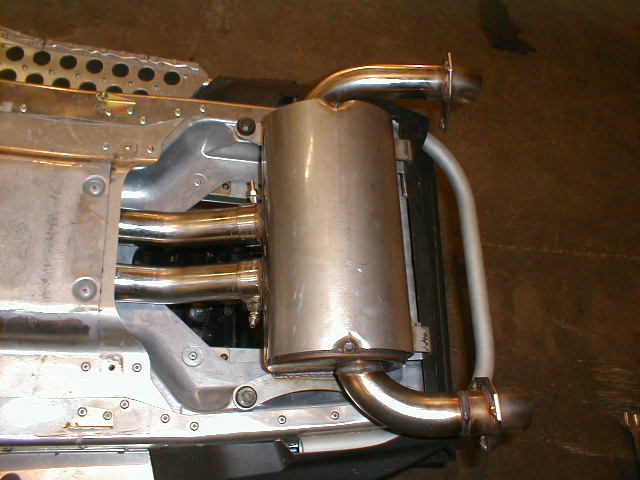
New Maxximum Performance Stainless Steel Exhaust |
Pic 10
Pic 11 |
|
Pic 12 |
4. To install the new stainless steel exhaust system, complete the
installation in reverse paying special attention to the alignment of the
exhaust pipes to the flex head pipe. Slight expansion of crossover pipe at
gasket area may be required to ease installation prior to installing the
gasket. 5. Install the muffler to the crossover pipe using the clamps supplied. Use a high heat silicone sealant on all connection joint to avoid exhaust leaks. Check for leaks periodically and adjust accordingly. |
|
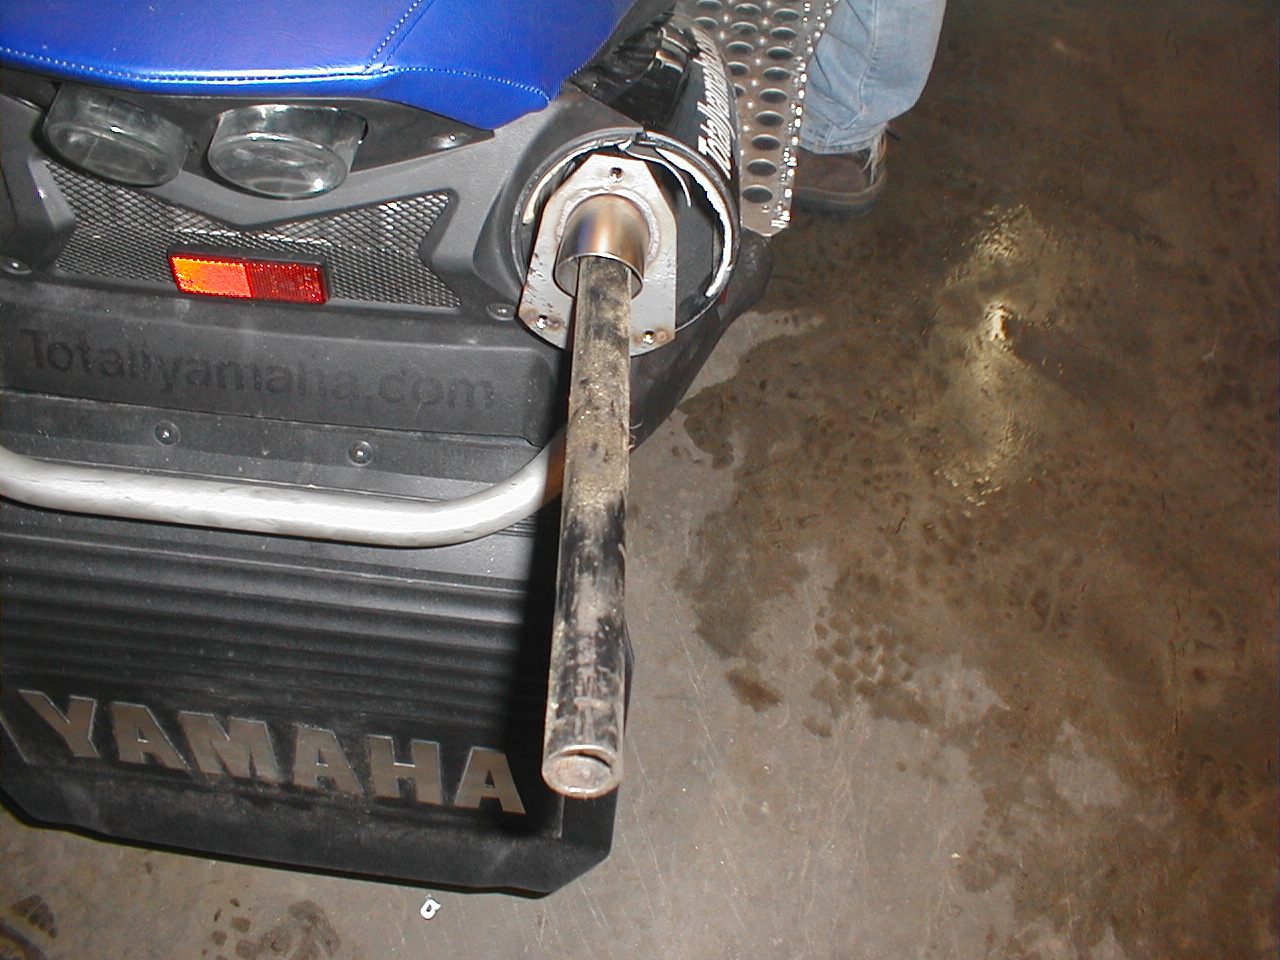
6. Minor adjustment or "tweaking" of tail pipes may be required for exact fit
as shown in Pic 13. Tighten all connections before replacing seat and fuel tank. |
Pic 13 |

Totallyamaha is not responsible for any damages that these modifications may cause to your vehicle; any modifications are your responsibility if you choose to do so. We are providing information ONLY. Some of these modifications may VOID your warranty and that is your responsibility to look into. The Totallyamaha users have passed along most of the information found on this site. If you have any questions or concerns about anything on this site talk to your dealer before using any of the information. Totallyamaha will not be liable for any damages or personal injury from any modification performed from this site.