Pyro 2001 EGT/Tach Install
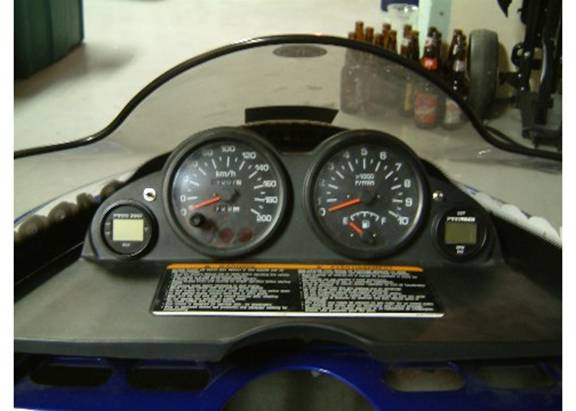
The first step is to remove the gauge pod from the sled. Unscrew the 8 screws holding the pod to the hood, and then unscrew the two screws that hold the headlight to the hood and bring the assembly to a bench.
Remove the wiring harness from the pod and set it aside. I chose to cut out the circles on either side of the gauges. Find the center of the circles and make a mark. Cut out the two circles with a 2” hole saw. Using a file open up both holes so the gauges fit in. Next mark the location for the toggle switches. Using a ¼” drill, drill the two holes. I chose to locate the switches close to the gauges Install the switches and the gauges.
Wiring:
The blue wire on the pyro with the tach was tied into the blue wire on the back of the tachometer. The black goes to ground on the tachometer. I tied the grounds together.
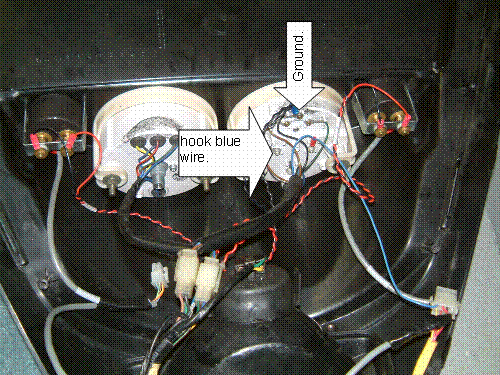
I found an unused 12v constant going to the Speedo. I tied the two red wires from the gauges into that wire. Check to make sure that it’s not used on your sled.
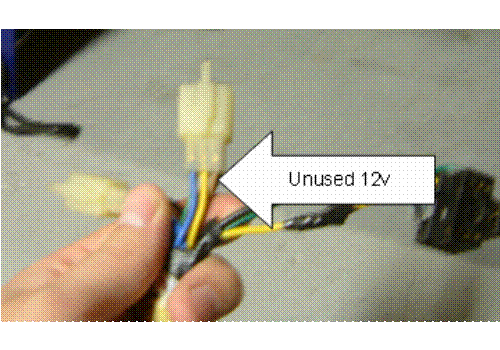
Here’s the 12v tied in.
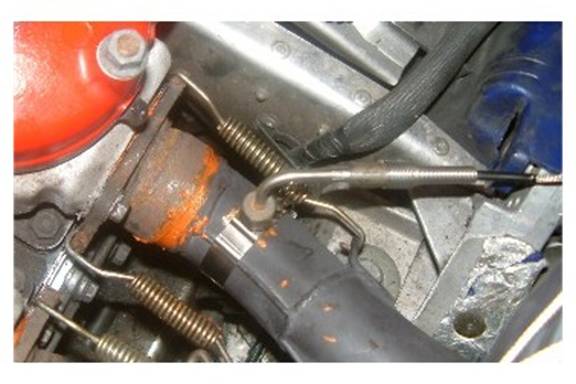
To install the egt’s into the pipes, place the clamps 2” to 3” from the cylinder and tighten them down. Using a 3/16” drill and the clamp as a guide, drill through the pipes. Then remove the clamps and open the holes to1/4” using a drill. Place the clamps back on the pipes and tighten them down. Install the probes so about ½” is in the pipe and tighten the nut. Route the wires alone the pto side of the sled and run them up the hood to the harness that goes to the gauges. I put the pto and center on the left gauge and the mag cylinder on the right with the tach. I used some insulation to cover the wires as they went over the pipes.
Here’s a picture of the clamp and probe installed
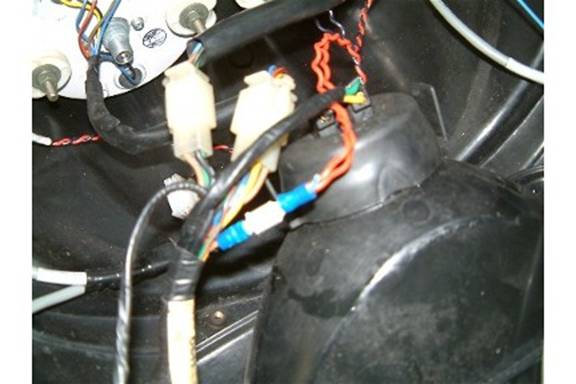
Here’s the wiring under the gauge pod.
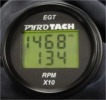
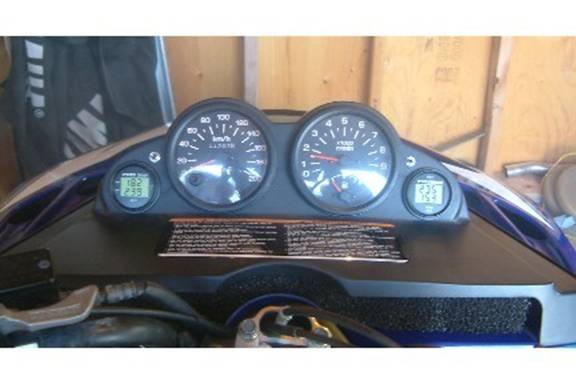
Here’s a picture of the gauges working. The stock tach is reading a little above 1500 rpm and the digital is reading 1530 rpm. Stock is pretty close!
The instructions that come with the pyro’s are very good so be sure to read them. The only problem I found was that they say to tie the red wires and the blue wire to the yellow wire going to the headlight. That wire is for the high beam, so when you use the low beam the egt’s turn off. The tach works off mag pulses so you could leave that wire on the headlight, but I think it looks cleaner wired to the back of the tach.
When you order the gauges you will need to order all the probes and clamps separately.
This is a very easy install. It will probably take the better part of an afternoon to complete.
By ekimsx600