Removing the Remote Adjust Mono Skid
To pull the stock remote adjust mono skid( See Note at bottom for EC Mono Skid), the 1st thing we will do is remove the rear transfer rod bolt.
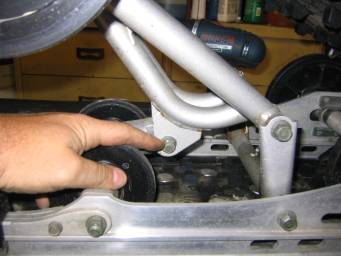
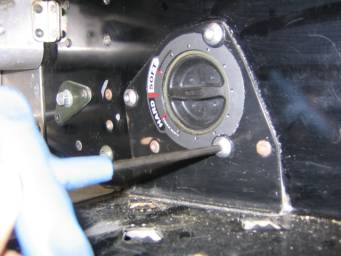
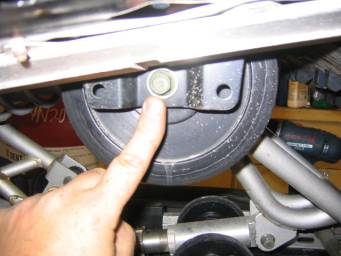
Once loose, you will have to raise the sled slightly to release tension to allow the bolts to come out. Next move to the remote adjuster, remove the 3 Allen head bolts that hold the adjuster to the tunnel. The adjuster will fall to the inside, so handle with care to not pull the adjuster cable out and place on skid. You may want to zip tie or tape adjuster to shock body but it’s not necessary if you stay aware it being only connected by the cable.
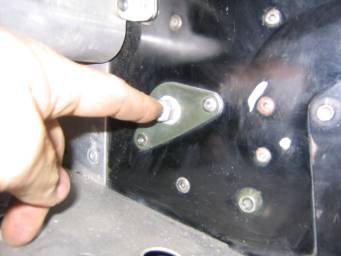
Lower the rear of the sled so its about 1” off the ground then remove the front mount bolts. You will have to hold the inside nuts with a 17 mm wrench and the outside with a 14mm. Once the front arm bolts are removed, and then remove the rear mounts bolts.
The skid should now fall to the ground. Raise the rear of the skid to allow more remove for you to pull the skid out the side of the track.
 >
>
To install the skid, pretty much follow procedure in reverse order but install front arm bolts before the rear.
Note:
To remove the EC Mono Skid, you will have to cut the all zip ties that hold the wiring down to the front mono ski arm. Then disconnect the connection at the top of the shock.
Then follow the procedure above.
Totallyamaha is not responsible for any damages that these
modifications may cause to your vehicle; any modifications are your
responsibility if you choose to do so. We are providing information ONLY. Some
of these modifications may VOID your warranty and that is your responsibility
to look into. The Totallyamaha users have passed along most of the information
found on this site. If you have any questions or concerns about anything on
this site talk to your dealer before using any of the information. Totallyamaha
will not be liable for any damages or personal injury from any modification
performed from this site.
![]()