RX1 Procedure for Replacing your Track
Remove side panels
Remove parking brake. The 4mm (Allen size) screws may not want to turn, as I had
to prick punch one while my son pulled on the Allen wrench, to keep it from
rounding off. Use a good wrench or try a 5/32 hex key as it seams to fit tighter.
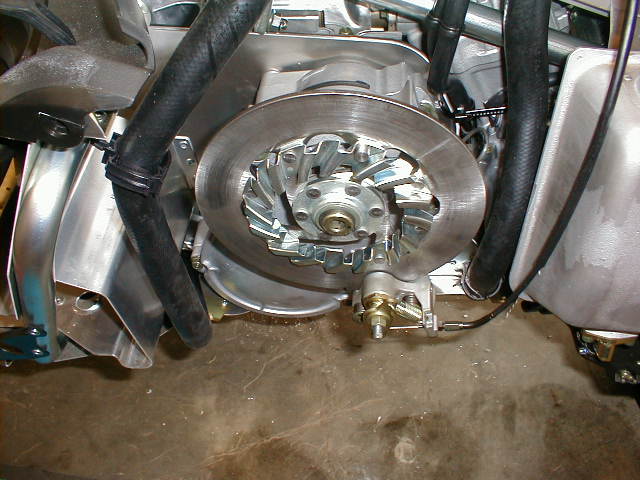
Remove the brake, and lay on the cylinder head
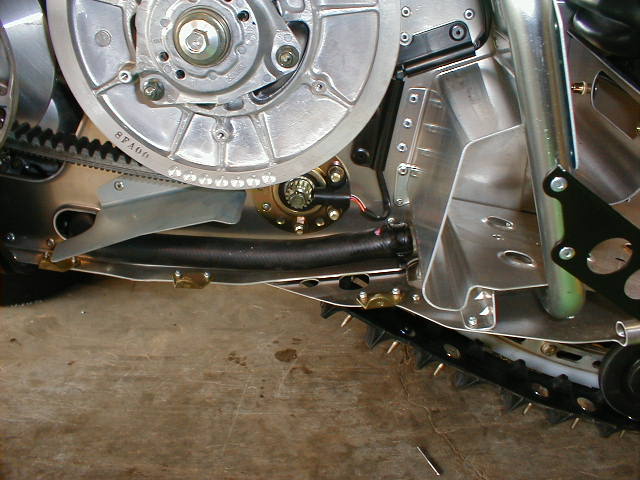
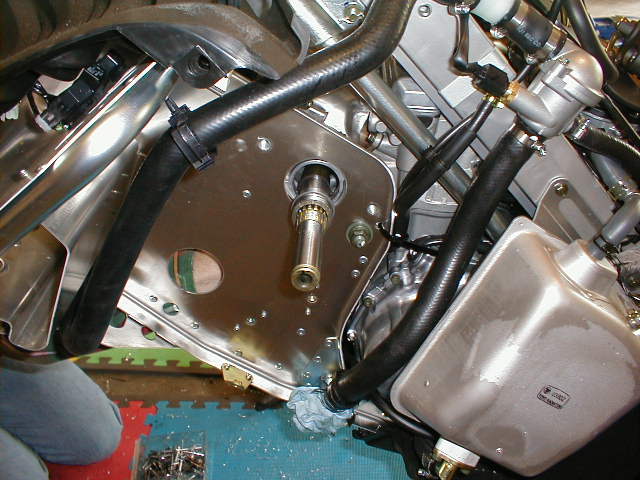
Remove brake disc and note shims and washers
Remove collar between disc and cover. Torx head set screw-T20
Remove cover and let drain
With the track on the floor, loosen bolt and nut holding sprockets. Upper
sprocket nut is a 36mm and the lower is a 14mm . You may need
someone to hold the driven as there is no brake to lock the shafts.
Loosen the driven pulley bolt also at this time
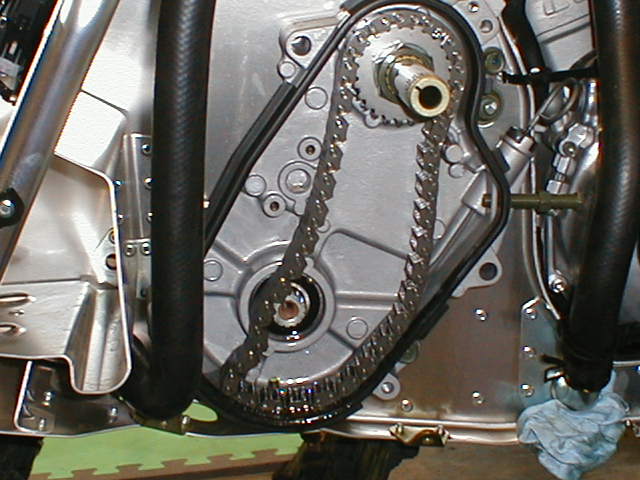
Loosen chain tension, remove roller assembly, and screw tensioner bolt back in
so it doesn't hit the coolant hoses when removing the chain case.
You will need a good feel, as you are removing two slide fits at the same time.
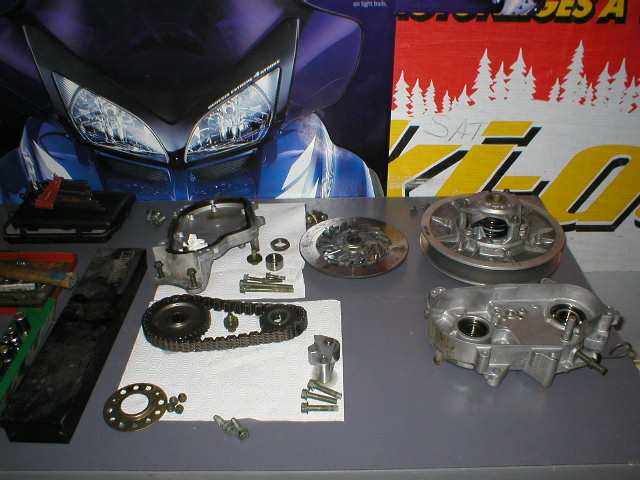
Remove sprockets, chain, and note spacers

Remove the rear suspension. I loosen the track, loosen the transfer rod bolts,
and then take out the 6 bolts, rear to front.
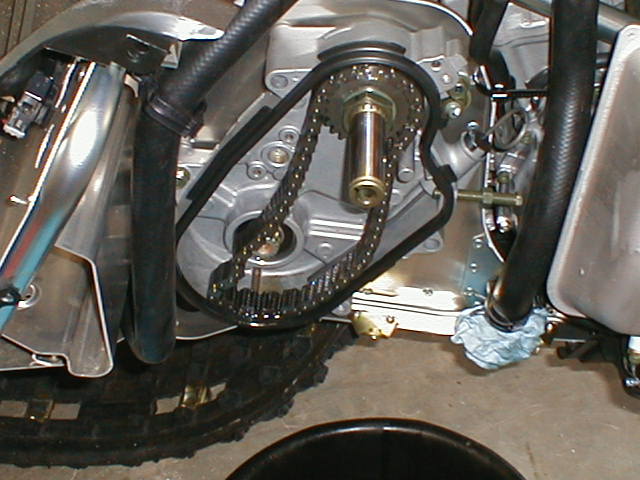
Unbolt the chain case, and slide it gently off, watching the oil seals.
Remove the driven pulley, speedo gear, and bearing retainer plate.
Loosen the torx screws on the PTO side axle bearing.
I sprayed them with blaster, but they turned easy anyway.
Slide the bearing off the axle...mine came off as I was moving it toward the
chaincase side, but I think you can slide the axle into the PTO side hole and
grab it with your fingers.
Move axle into chain case hole, while disengaging from track lugs. Pull the PTO
side of axle toward you and remove.
Work the bearing on and off the shaft, so it installs easy. I put some grease on
it too.
On reassembly, use 242 blue loc-tite on the two bearing torx screws, and on the
spacer torx screw behind the disc brake.
Also loc-tite the lower sprocket bolt.

By: SumpBuster & extra Pictures provided by the Webmaster
Totallyamaha is not responsible for any damages that these modifications may cause to your vehicle; any modifications are your responsibility if you choose to do so. We are providing information ONLY. Some of these modifications may VOID your warranty and that is your responsibility to look into. The Totallyamaha users have passed along most of the information found on this site. If you have any questions or concerns about anything on this site talk to your dealer before using any of the information. Totallyamaha will not be liable for any damages or personal injury from any modification performed from this site.
![]()