
"AMTECH
Racing"
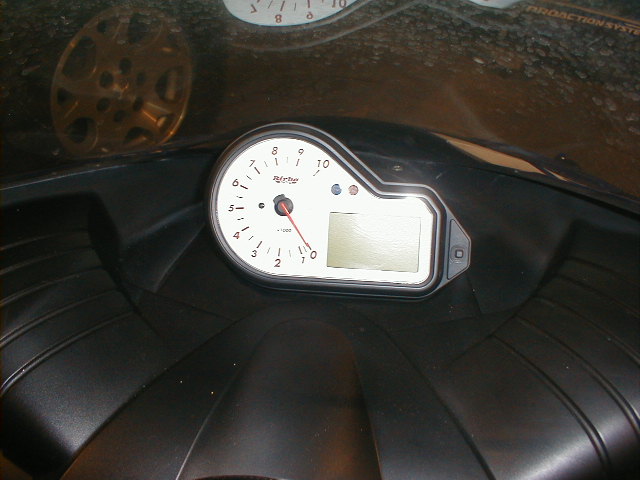
Viper White
Face Gauges
These are replacement faces, they are not to be installed on the top of the original faces!
Considering this operation delicate please follow these instructions carefully and assemble calmly and
patiently.
1. Before removing the instrument gauge cluster, start engine and let vehicle rise to operating temperature. At this time note readings on all gauges. (A digital picture or a Polaroid might be very helpful) Take note
of the needle position. A diacom might be very helpful in setting the proper MPH or KM/H, water temp and
tachometer readings if anything went wrong during disassembly. On the back of
your instructions there is also a copy of the original dial so you can use this to take reference. Once
finished, turn motor and ignition off. This is to assure that the needle is in the right spot when we are done.
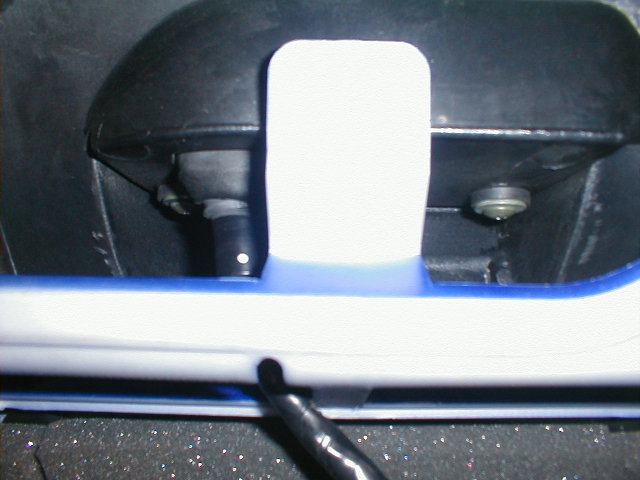
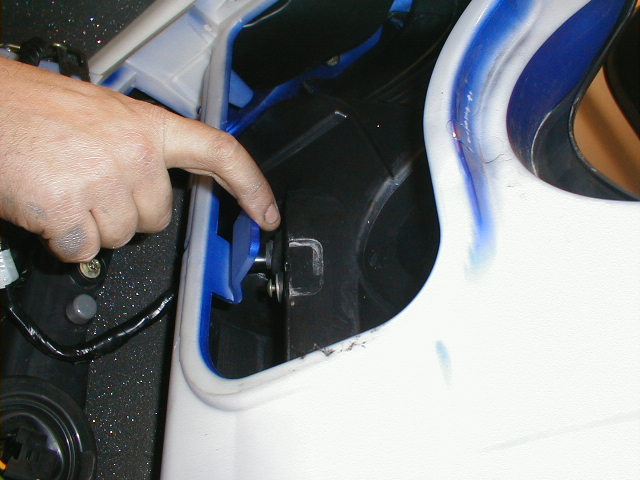
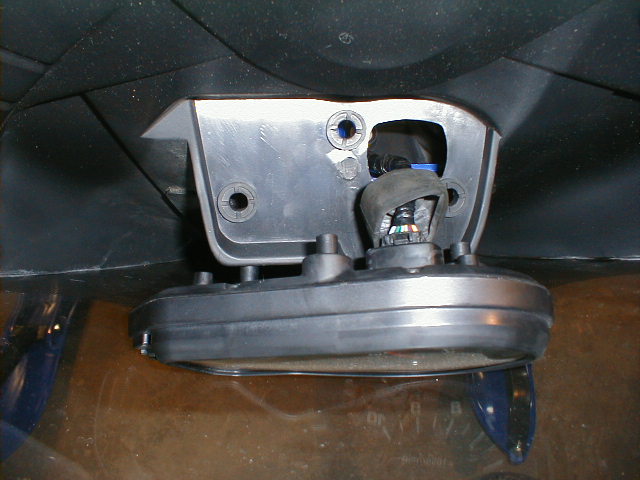
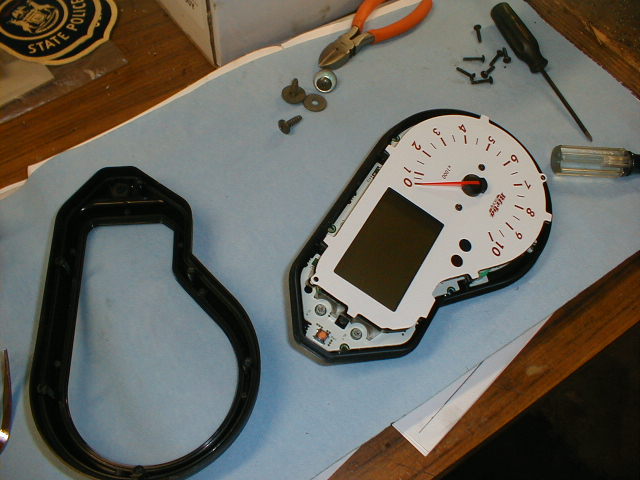
2. Remove the cluster from dash. There are 3 screw, 2 that are very visible and
one hidden behind the hood flap, see pictures below. Angle Phillips head screw
driver will ease removal.
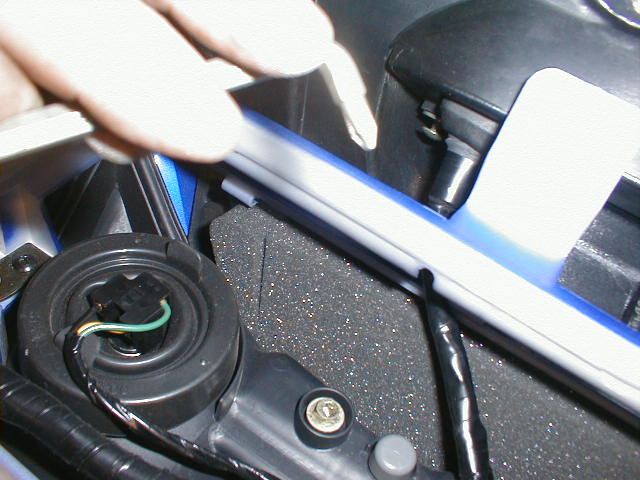
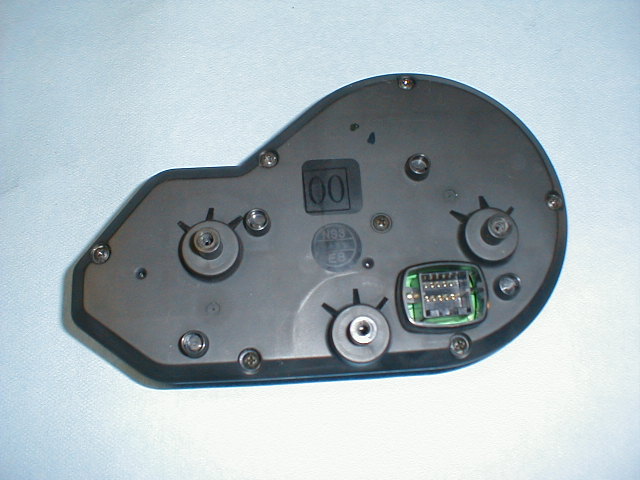
Pull Gauge assembly towards the windshield carefully and slip rubber boot from the plug. Unplug gauge harness and the Gauge pod is ready for the next step.
3. Now you have to mark the resting point of the needle. Remove pin stops (when present) with pliers by lifting straight up. Make sure you note exact position of needles when pin stop is removed. Before removing needles you need to mark on the external side of each gauge where needle rests or you can write this information on the back of
the instructions. When there are not pin stops, the resting point corresponds to the minimum value showed by needle. We have provided a copy of the faces, which makes a good reference to mark the exact location of the needles.
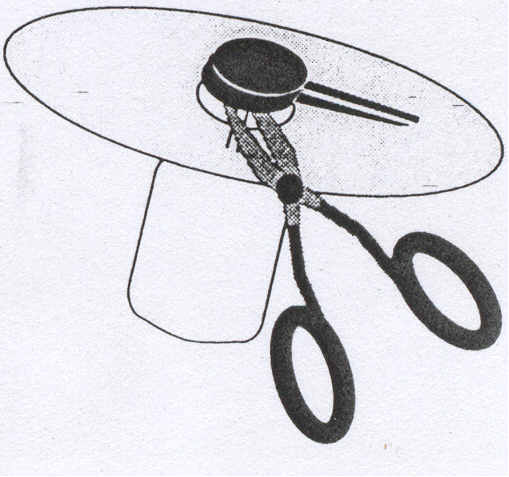
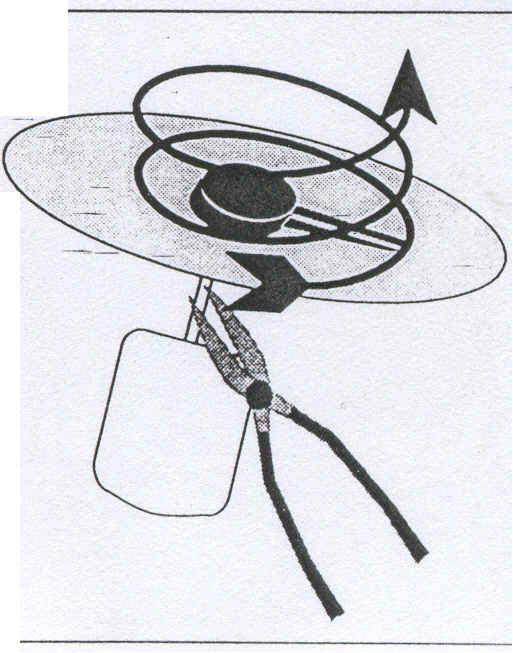
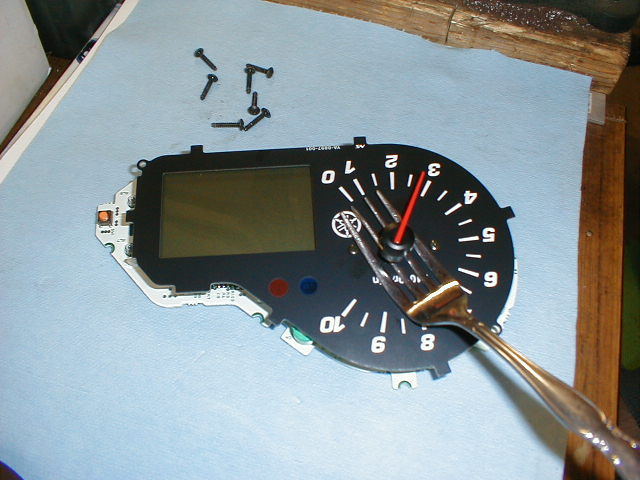
4. Remove needles. You must
use a curved scissors (similar to those used by electricians) or a fork using
the lever technique (fig. 1 & Picture). Place under the needle and using a very light amount of pressure at 12 o'clock position, slightly lift under needle lifting with minimal pressure. Repeat procedure at 3, 6, and 9 o'clock (in clockwise movement around shaft) until needle is removed
from shaft. Its also possible to remove the pointer using thin pliers to stop the needle behind the dial and pull the pointer turning as if you would to unscrew it (fig. 2).
5. Remove screws on the faces . Some stock faces are glued on, so start at the corner of the face and lift the face off the clear plate. Use a small amount of solvent to get the remaining glue off. Don't press too hard, or
pull too anxious, take your time if you want to save faces for later use. Make sure the surface
is dry and clean for proper sticker placement of new gauges.

6. R remove any marks on the faces using a humid non-abrasive cotton swab. This
face being a direct replacement requires not adhesive type tabs, just set the
new face in place after older style is removed.
7. Now that the face is in place, it's time to reverse the procedure. When placing needles back on the new faces, the pointer should be as close to original position as possible (as noted in step 3). For speedometer and tachometer, once the needles are installed, lift needles to 12 o'clock position and release, they should return to original position. When stop pins are used, raise needle clockwise forward approximately 20 MPH and 1000 rpm above the pin, replace pin and release needle to rest at pin stop.
Re-install screws back onto the gauge faces.
8. After the needle is installed back on the face (don't screw on the front of the cluster yet), plug cluster back in, and start engine. At this time, make sure all gauges are working properly. If everything is correct, replace cover and reinstall
screw in the gauge cover and install back into the dash of the sled. If not, let vehicle rise to operating temperature and check with positions of gauges in step number 1. Pull pin and reset to new and correct position. This is where you might want to plug in the diacom, copy or scan tool for double checking that everything is set to the proper position.( Now is a good time to check your bulbs to make sure they are all good. You can use a higher wattage bulb. But we recommend against it since the gauges were designed for the stock bulbs and anything brighter may cause hot spots.

Totallyamaha is not responsible for any damages that these modifications may cause to your vehicle; any modifications are your responsibility if you choose to do so. We are providing information ONLY. Some of these modifications may VOID your warranty and that is your responsibility to look into. The Totallyamaha users have passed along most of the information found on this site. If you have any questions or concerns about anything on this site talk to your dealer before using any of the information. Totallyamaha will not be liable for any damages or personal injury from any modification performed from this site.
![]()