Recommendations for studding your Yamaha track
There are many methods people use to stud there track. The following is one method we at Totallyamaha use for our Yamahas.
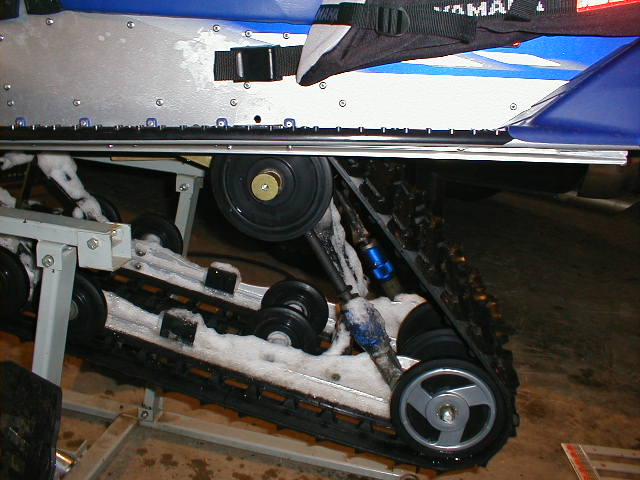
First thing to do is pull the rear bolts and let the suspension hang. This will aid in drilling the track right on the sled being careful not to drill the wheels. See thumbnail.
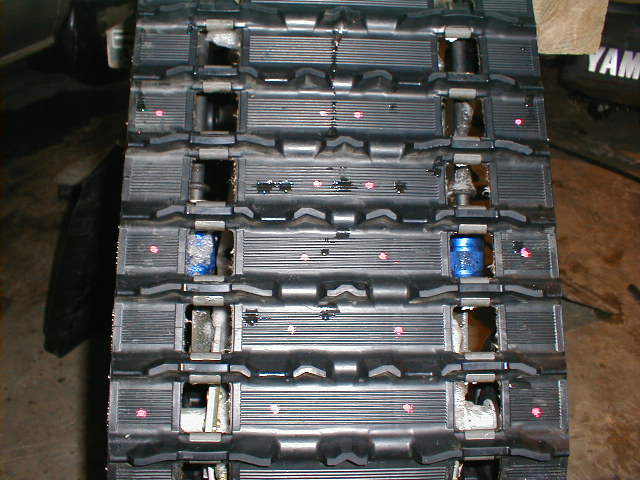
Second thing is to stud your tracks with a template along with the quantity you desire. But some may choose there own pattern. Be sure to try to get as many scratch lines as possible. Mark out all the locations with a paint marker and a backer if no template is available in the entire track.

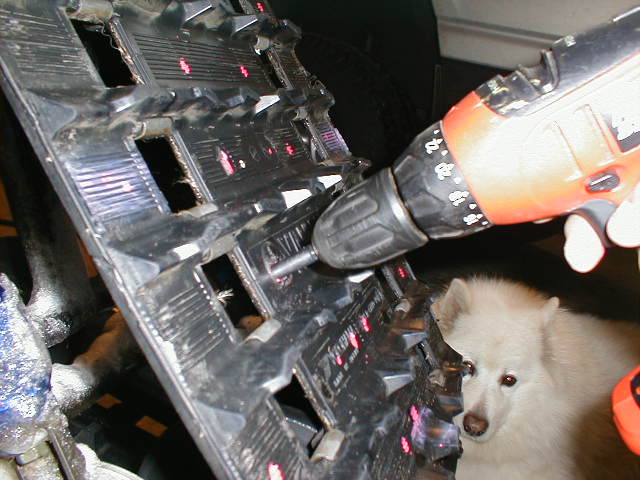
Then start drilling . Make sure when your drilling you get the cutter so hot that you smell rubber burning and keep it hot as possible to help melt the cords back together in the track.
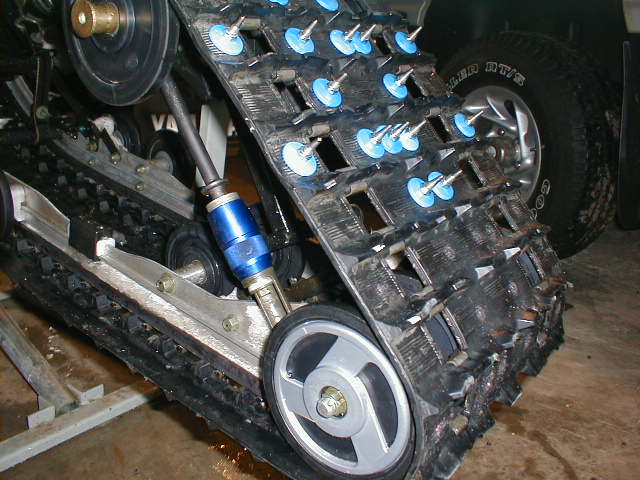
Then after drilling is complete, use a cordless drill with a clutch and a 1/4 drive extension and set the clutch to pull the stud flush with the track . The backer should be flat. Be careful at this point to not OVER TIGHTEN the backer by watching the edges of the backer to prevent edges curling. Do not loc-tite them... even with the blue loc-tite just in case you need to fix any by chance they brake, bend or a backer fails. Trust me on that. Then after all studs are in , go through the track one more time to make sure you didn't miss any. Finally , swing the suspension back in its position and tighten the bolts. If by chance you are having a hard time aligning the bolts loosen the bolts at the rod ends and that will help you align the bolts with the holes. Then recheck all bolts to make sure tight and you are good to go.
Be sure after a few hundred miles to check track tension and re check tightness of the stud nuts.
Guide to bolting a Pro-action Suspensions Back in if taken out for Maintenance or Studding
This is definitely a 2 person job so get yourself a second set of hands. If you haven't done it already, you will need take the track tension adjusters and pull them in to aid in slipping the skid back under the sled inside the track . Front skid bolts go in 1st, under the foot holds. Then center bolts go in next, but at that point you might want to take out the bolts at the base of the transfer rods to remove the coupling. That will help you align center bolts. After center bolts are in , align rear skid bolts and finally crank back in the transfer rods bolts. Might have to push down on the suspension to compress it to get transfer bolts started. Re tighten the track to spec in your owners manual.
After you've got the skid positioned back inside the track, flipping the sled up on it's side makes getting all the bolt holes to line up much easier than trying to hold the skid up while it hangs under the sled. It's easier because the weight of the skid is mostly supported by the tunnel.
Jeff
Totallyamaha is not responsible for any damages that these modifications may cause to your vehicle; any modifications are your responsibility if you choose to do so. We are providing information ONLY. Some of these modifications may VOID your warranty and that is your responsibility to look into. The Totallyamaha users have passed along most of the information found on this site. If you have any questions or concerns about anything on this site talk to your dealer before using any of the information. Totallyamaha will not be liable for any damages or personal injury from any modification performed from this site.
![]()